Showing posts with label Recipe. Show all posts

Monday, September 23, 2013

Perfect GF Apple Pie

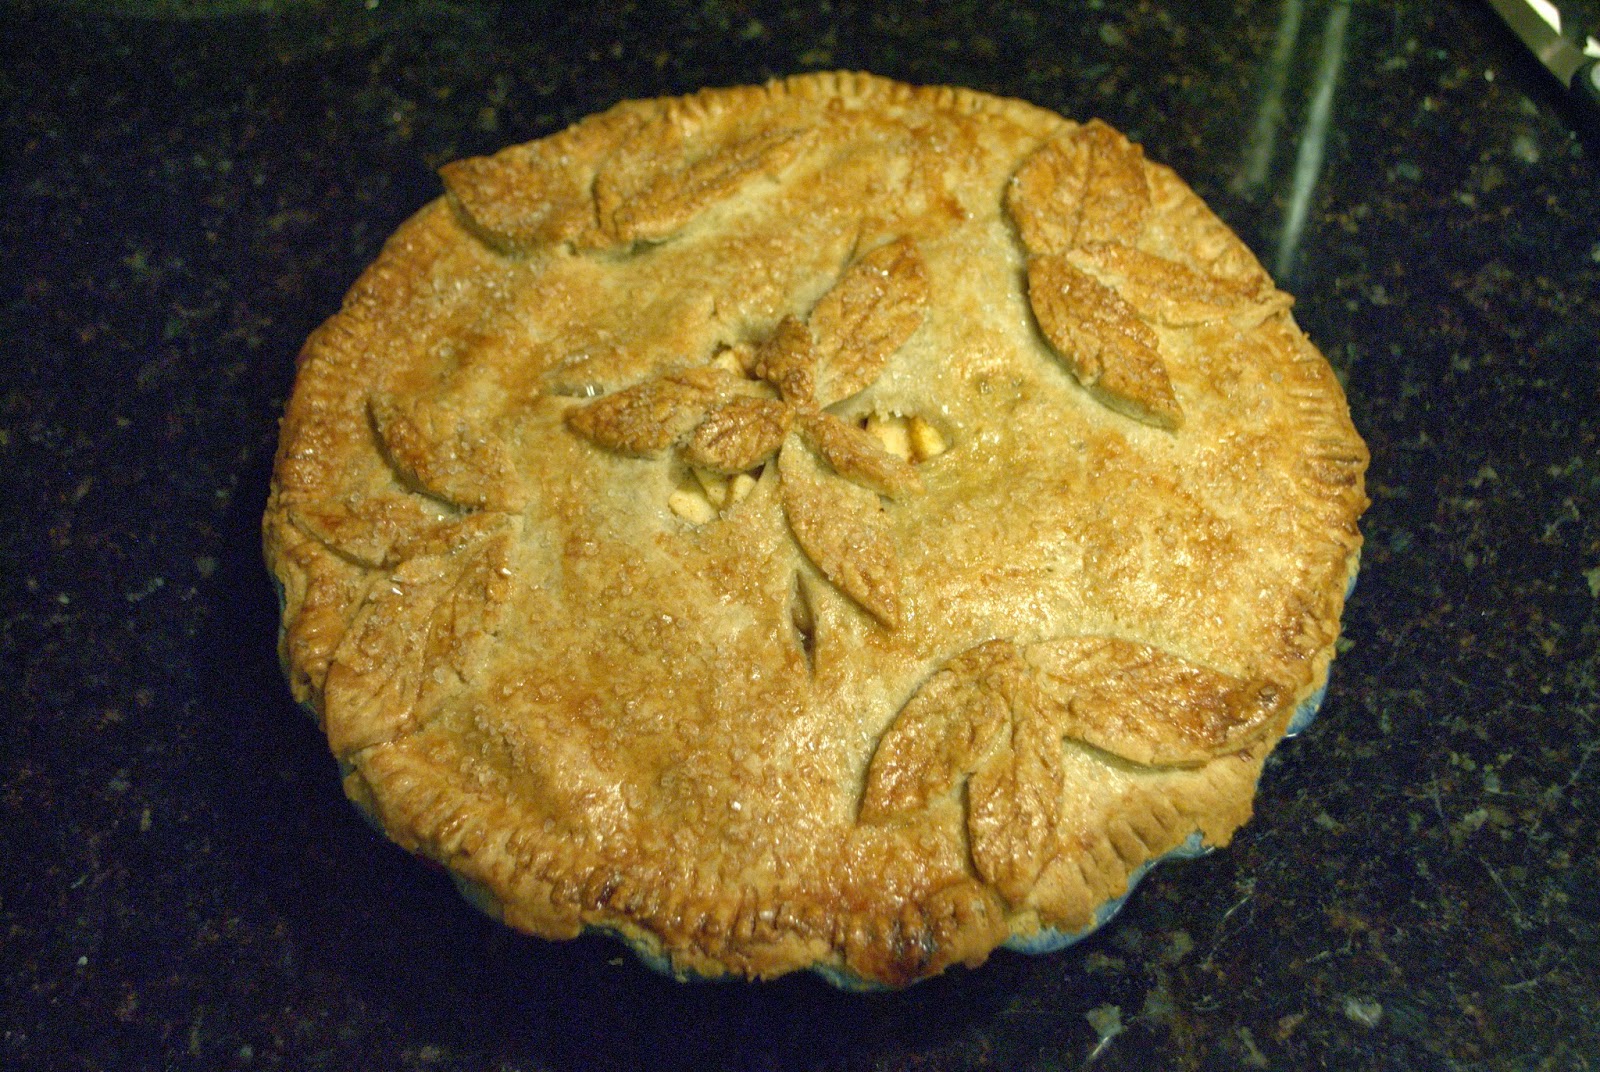
So I had a bunch of apples left over from an event I did and after much internet surfing for ideas on what to do with a bunch of apples... I settled on Apple Pie! Seeing as yesterday September 22nd was the 1st day of Fall, it just seemed like the best way to bring in my favorite season!


Gluten Free Apple Pie
Crust: 
Pamela's Gluten Free Bread Mix
Follow the pie crust recipe on the side and do the half butter and half shortening combo for the best crust!

Filling:
10 firm tartly sweet apples (I used Galas because thats what I had left over and needed to use up but normally I would use Granny Smiths of Pink Ladies)
1/2 cup + 1 tbs white sugar 
2 tbs brown sugar
1/2-1 tsp Cinnamon (depending on how much you like it)
1/4 tsp Nutmeg
4-5 tsp Lemon Juice

1. Preheat Oven to 350. Follow instructions for Pie Crust, divide dough in 2 balls and refrigerate for 15 minutes (cover in plastic wrap.
2. Take one ball of dough and roll out between two sheets of parchment paper with large enough surface to cover pie dish. 
3. Grease pie dish with shortening and then sprinkle with gluten free flour (shake out excess). 
4. Then remove top sheet of parchment from dough and roll gently onto rolling pin to transfer crust over pie, unroll gently with bottom sheet on top so you can remove. Gently lift and place crust into dish and cut off excess around the edge. 


5. Poke fork holes around bottom of pie to crust stays flat.
6. Place pie crust in oven to pre-bake for 25 minutes. 
7. Using a potato peeler, remove skin from apples, cut out the core and slice apples into 1/4 thick slices. 
8. Sprinkle lemon juice over apples, use hands to mix apples gently so they dont break up. 
9. Mic sugars and cinnamon and nutmeg together, then sprinkle 1/4 of mixture over apples and mix with hands. 
10. Place apples covered with plastic wrap in refrigerator if crust isn't ready. When crust is pre baked, layer apples into pie crust- (do not just pour it in, layer the flat slices one of the other, this makes a nice thick and full filling that wont "fall" when your pie cools off after baking)


11. Every few layers- sprinkle the extra sugar you reserved over apples. About a tbsp per new layer. 
12. Pull out 2nd ball of dough and roll out to be large enough to cover surface. Using same method for bottom crust, gently roll up onto rolling pin and position over pie. 
13. Using a fork, seal edges of crust gently and cut 3 "leaf" shaped holes out of center of crust so steam can escape. 
14. Decorate crust with left over crust leaf cut outs or other shapes. 
15. Beat one egg and brush liberally over crust then immediately sprinkle large sugar grains (turbinado works well) all over pie for a nice crusty and sparkly finish!

16. Place pie in 350 oven and turn heat up to 375. Bake for 45 minutes, cook another 15 if crust still needs to brown some more. Let pie rest for at least 2 hours so can set up before cutting into.


Enjoy!

Saturday, August 10, 2013

Quick Chicken Spaghetti

Sometimes I just want quick, easy and comforting for dinner. Hmm, actually, I pretty much always want that for dinner. But in addition I really like it to be healthy too!

This is an easy receipe that you can make for the whole family in 45 minutes or less. Use any pasta you want, or skip the pasta and serve it with a salad. I try to eat pasta no more than once a week max because it is heavy and because if I don't limit myself, I could have pasta every night happily because I love carbs. But limiting it to once a week makes it all the more delicious and something to look forward to on a night when I want to throw something together quick and can turn to it!

Chicken Spaghetti:
Serves: 4
Prep Time: 10 minutes
Cook Time: 30 minutes

4 skinless chicken breast
1 12 oz can diced Italian tomatoes
3 fresh tomatoes (sub an additional can if you don't have fresh)
3-4 cloves garlic- minced
1 box gluten free spaghetti 12oz or more
2 tbs olive oil
1 tsp and 1 tbs each: Basil, Oregano, Marjoram
1 tsp salt
1 tsp pepper
Optional: 1/2 cup dry white or red wine

1. Clean chicken and cut into even 2 in thick strips. Salt and pepper, add 1 tsp: oregano, basil and marjoram
2. Heat olive oil in large deep dish skillet. Add chicken strips and cook 3 minutes each side over medium heat.
3. Fill Large Stock Pot with water 3/4 way full and place over high heat. Bring to boil.
4. When chicken is browned on al side, add canned and diced tomatoes over them in pot. Add 1 tbs of Oregano, Basil and Marjoram. Add 1/2 cup wine.  Cover, turn heat to medium low and let simmer.
5. Add pasta to large stock pot when water comes to rolling boil and follow directions for cook time.
6. Drain pasta, check chicken to make sure cooked through.
7. Serve Chicken and sauce over pasta.

Enjoy!


Monday, July 22, 2013

Blanched Kale Salad and Lemony Shrimp

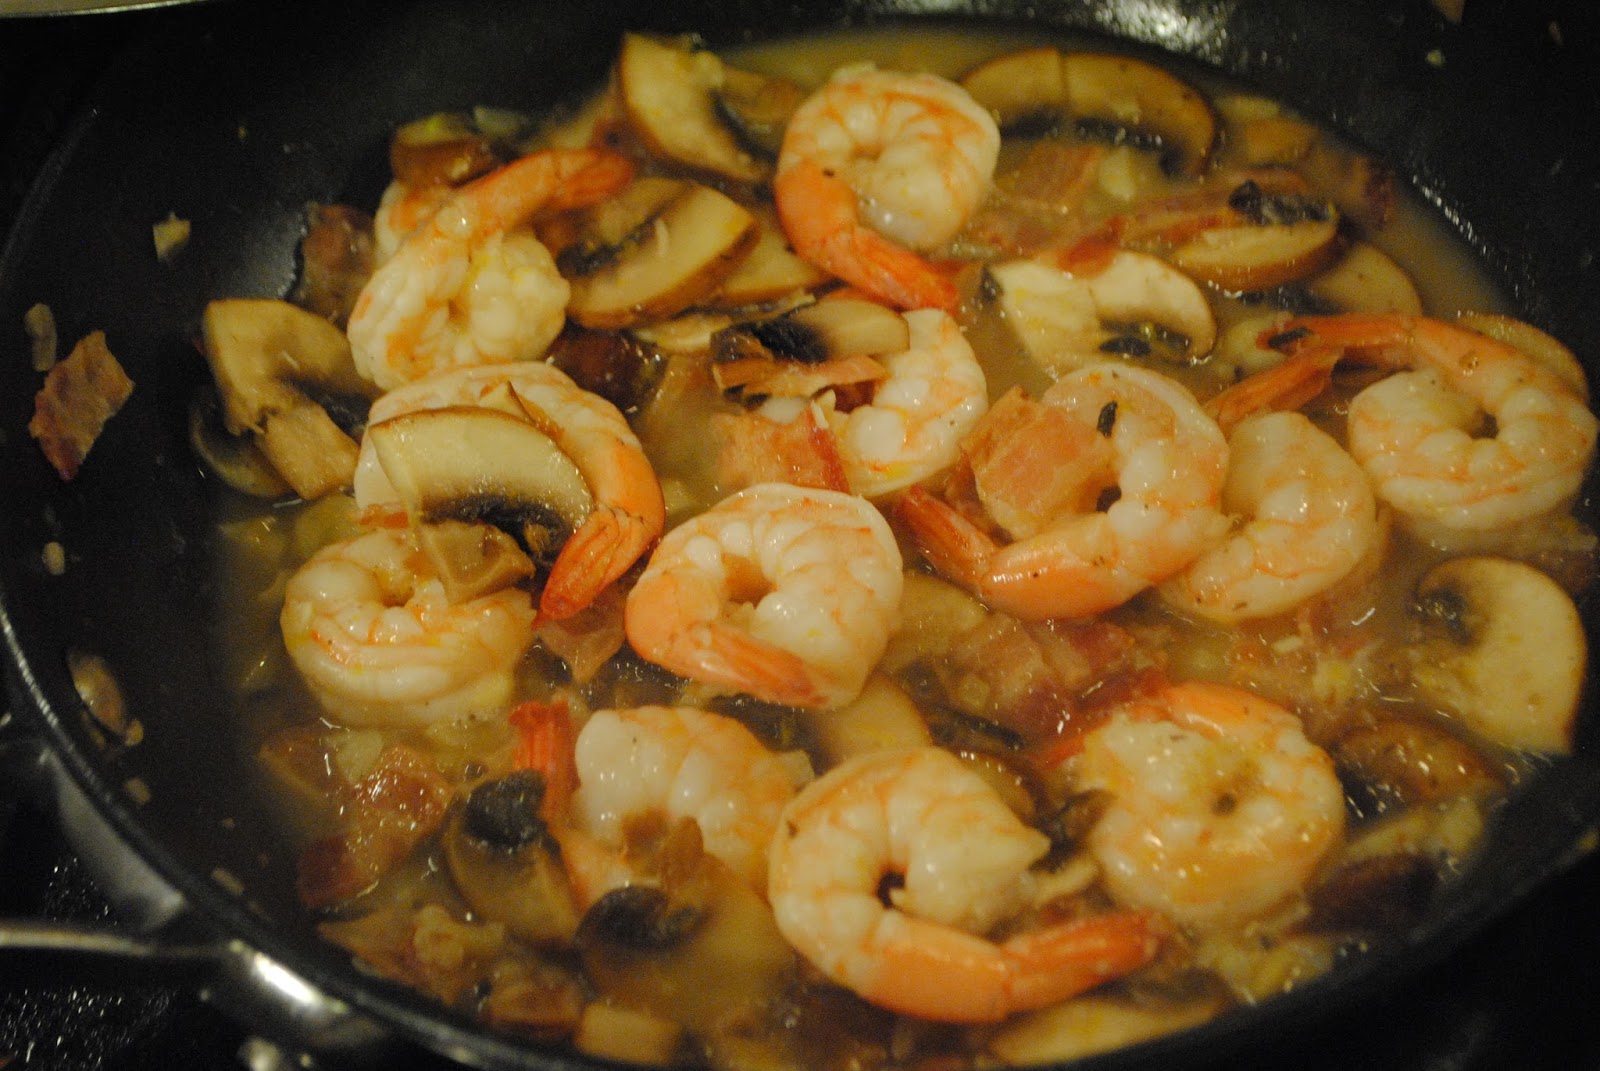
Last night I had one of those... hmm, what to cook nights. And after looking through the fridge and freezer I threw together a tasty and healthy dinner of Blanched Kale Salad and Shrimp with Mushrooms in a Lemony sauce. 

I love Kale... but not raw. I just have a really hard time getting past the deep earthy mineral-y flavor. So  my way of getting around that while still maintaing all the nutrients of raw Kale is to blanche it! Its so easy! Then I just make whatever dressing I'm feeling like and mix it up and ta-da! A beautiful bright green and still crunchy Kale Salad with a much milder flavor. 


Kale Salad:
Serves 4
Prep Time: 10 min

8-10 Large Kale Leaves- de-stalked and chopped into 2 inch pieces
1 tbsp Balsamic Vinegar
1tbsp Lemon Juice
1-2 tbsp Extra Virgin Olive Oil
1 fresh corn on the cobb- just the kernels sliced off and quickly sauteed for 2-3 minutes
1/2 cup cherry tomatoes quartered

1. Place chopped kale leaves in a large heat safe bowl, pour near boiling water over kale just enough to cover. 
2. Using tongs swirl kale, making sure all leaves are submerged. Wait 30 Seconds
3. Drain water and refill with cold water from the sink- add 2 cups ice cubes
4. Using tongs stir kale to make sure the ice water reaches everything and then drain. Squeeze excess water from kale leaves. 

5. Loosed kale by gently rubbing leaves through your fingers. Add Balsamic Vinegar, Lemon juice and Olive Oil. Stir kale to incorporate evenly, then add corn, tomatoes, and Salt & Pepper to taste.

Serve immediately or store in a sealed container the fridge for up to 2 days. 


Shrimp with Bacon and Mushrooms in Lemon Sauce:
Serves 4
Prep Time: 20-30 min
Cook Time: 20 Min

1 bag shrimp, peeled and deveined
6 Large Baby Bella Mushroom- sliced 1/4 inch thick
6 slices bacon- cooked and chopped (I use the Oscar Meyer precooked)
3 cloves garlic- minced
1/4 cup white wine
4 tbsp butter
2 tbsp olive oil
1 lemon- zest and juice

1. Thaw shrimp in cold water for 20-30 minutes ahead of time
2. Heat skillet to medium high, add 2 tbs butter and 1 tbs olive oil. Once heated add mushrooms- cook until nicely carmelized. About 6-8 minutes
3. Put mushrooms in prep bowl, cook or reheat bacon depending on if using raw or pre-cooked. Drain any excess oil.
4. In same pan as mushrooms and bacon, add 2 tbsp butter and 1 tbsp olive oil. Add minced Garlic. Add Shrimp. Turn heat to medium. Add 1/4 cup white wine, lemon zest and lemon juice.
5.  Cook shrimp in sauce until cooked through, about 2-3 minutes per side. 

Serve over rice, pasta or a salad!


Wednesday, July 10, 2013

Ruby Juice: A Juice Recipe

So I started a juice fast on July 4th. Yes. The day of hot dogs, hamburgers and in general as much cookout food as you can eat. That is the day I chose to start my juice fast journey.
It really wasn't to rub it in on myself that I could only drink juice.. it just happened that it was a 4 day weekend and since sometimes there can be, ahem ::cleaning out:: if you catch my drift that occurs in the 1st few days of a juice fast as your body rids itself of your last few solid meals and toxins. So, I figured it would be better to start it while I could be home for a few days. 

So far I have lost 8 lbs and 1 1/2 inches around my hips and around my waist. But really I am doing this to start a new habit of healthy lifestyle and it starts with food. The weight loss is definitely a bonus, but I am trying very hard not to let it be my motivator. 

Anyway, since I'm not cooking and making up recipes as I usually do, juicing has become a whole new test kitchen for recipes. I have definitely made a few gag worthy concoctions but I am learning and getting better as I go. I also just have to say that juice Kale will just never be appetizing to me and I will always taste it no matter what I juice over it to try to hide it... I still juice it though. 


Ok, enough banter. You wanted to see a recipe! I made this the other morning with just 3 ingredients and it was so pretty to look and and super scrumptious to feast on! All day I kept thinking of it as Ruby Juice because of its pretty Ruby Red/Pink color so that is what it shall be called!

Ruby Juice:
1/2 a medium or 1/3 a large watermelon (pink flesh only, seeds don't matter)
1/2 cantaloupe (rind removed)
2 blood Oranges

1 Juicer! Use the low setting and watch your level, my juice pitcher actually overflowed a bit. 
Stir and enjoy! I personally like my juice nice and cold so when its just made I pour it over ice, otherwise keep you extra in the fridge for 2nd when you get hungry again! :)

Tuesday, June 18, 2013

Cauliflower "White/Alfredo" Sauce

Ok, so it has been a while since I posted a recipe for you all. In truth I cook dinner for my family nearly every night of the week but 75% of the time I'm half started on making dinner before I remember I should have grabbed my camera.  And about 50% of my meals are staple favorites like Spaghetti Squash Spaghetti, Grilled or Broiled Salmon, Grilled Chicken with various veggies or Salad. 


But it has been too long my friends! So when I was on Pinterest yesterday and saw a pin for Cauliflower Sauce, well I just had to try it and see if it turned out as well as the Cauliflower Pizza!
I also had a package of frozen "fresh" calamari and though I could add those into this meal. 


The Cauliflower Sauce is really simple. I'd go with white cauliflower unless you want to freak your fam out and buy the purple kind!
Cauliflower White Sauce:
Servings 4
Prep Time: 5-10 min
Cook Time: 10 min

1 Large fresh head of cauliflower 
8 cloves garlic
1 tbsp unsalted butter
1 tbsp olive oil
Salt and Pepper to taste ( I found that because cauliflower is so bland that I had to season more than I normally would)

1. If using a whole head of cauli, cut off stalk and break into medium bunches.
2. Place cauliflower in pot over steamer rack (I'm not a fan of boiling but if you prefer you can boil them to) Steam for 6 minutes. 
3. Now de-skin garlic and mince. Place in unheated small skillet with 1 tbsp butter and 1 tbsp olive oil and bring to medium temperature- cook about 3 minutes (don't let the garlic brown as it turns bitter tasting)
4. Drain cauliflower and reserve 1-2 cup of cooking liquid.  Place drained cauliflower in blender or food processor and add garlic with butter/oil mixture.
5. Blend 30 seconds, then add 1/2 cup water, blend 30 seconds. Add water until you reach desired consistency (do you like thick or thin sauce?) I added about 1 cup total. 

6. Serve over your favorite pasta, mix with rice for a "cheesy" sauce or use as white sauce  for pizza!  The sky is the limit really. 

I put mine over some gluten free spaghetti (I'd have used linguini if I'd had it) and added green peas and some pan sauteed calamari. And then I added Old Bay and it was delicious! :) The family approved! Except next time I think i will use a bolder flavored protein like salmon, ground turkey or shrimp because the whole dish while it looked nice was really bland even with the seasoning I'd added to the calamari and the sauce until I added some Old Bay. 


Monday, April 22, 2013

Baked Strawberry Pie with Gluten Free Crust

So most birthdays we do cake... but it used to be that around spring we'd have strawberry pie... sometimes just because and sometimes for my mom's birthday since that's what she always had growing up for her birthday. 


So this year I decided I'd surprise mom and make her a strawberry pie for her birthday since she has been out of town on a church retreat. But our fridge was full to the brim with chicken stock and a million quart containers of Brunswick stew from the Spring Stew fundraiser my Dad and the men's group do at the church. Therefore the traditional gelatin based strawberry pie we always have wasn't going to have somewhere to set up in the fridge. 

Also gelatin kind of freaks me out because you never know if you've done the recipe right until its been 24 hours and you can see if the filling has set up and I didn't feel like possibly messing it up. (Yes, I know, I have perfectionist issues!) Plus the idea of a baked pie to go with the Homestead Creamery Vanilla Ice Cream I'd bought at our local farmer's market when I bought the strawberries just sounded better. 

So after doing a bit of recipe searching on the web I found what I felt would be the tastiest and semi easiest pie to bake (number of ingredients wise) and got to work!

While I am no longer following a strictly gluten free diet thanks to having my celiac tests come back negative... I used a gluten free pie crust because well... it is SERIOUSLY the best pie crust ever!

The recipe I took my cues from The Little Epicurean blog and I'm going to have to go back to visit because she had lovely photographs and lots of recipes I think I'd enjoy! 

I followed her recipe for the filling with a few adjustments along with her directions for pie construction but used my own gluten free pie crust.

Once you make this pie... you will find the idea of eating any store bought Strawberry Pie offensive! Why would you when you can have this goodness without a huge effort!?

So here it goes:
Gluten Free Baked Strawberry Pie:
(Modified Version of The Little Epicurians)
2 quarts washed hulled and sliced Strawberries (next time I'm going to use 3 quarts)
1/2 cup granulated sugar or more depending on strawberries sweetness (I used closer to 1 cup)
3 tbs cornstarch (next time I plan on doubling this to 6 tbs or testing out using tapioca powder)
1/2 tsp sea salt

For the crust:
I use Pamela's Bread Mix and follow the recipe on the back for Pie Crust.  I highly recommend it! It has the perfect balance of sweet and savory so it works for either kind of pie. It also comes out nice and flaky and holds up really well to juicy fillings. All you need to add is butter &/ or shortening ( I use both) and some ice cold water. Bonus... its Gluten Free but your friends and family will never know!
A few tbs milk
Large grain sugar- either turbino or decorative clear sugar sprinkles


To Make:
1. Follow recipe for pie crust. 
2. Once chilled roll out 1 ball of dough and carefully (extra careful because gluten free tends to break much easier than regular flour) place dough over greased pie dish and gently press into form. Trim off excess around edge using a knife. 
3. Place pie dish in fridge to chill while preparing strawberries. Also Preheat Oven to 450.
4. Wash, hull and drain strawberries. Slice- I sliced mine into 1/4 inch thick slices instead of quartering. 
5. Place stawberries in mixing bowl and add sugar (as much as you need according to how sweet your berries are) cornstarch and salt. Mix well with a spoon, the berries will naturally start giving off some juice which will help everything blend. 
6. Pull out pie dish and gently pour berries into the pie
7. Roll out your top crust between two sheets of parchement paper and gently lay over the top. Using thumbs firmly press crust around edges or use a fork
8. Cut 4 slits in pie around center to allow steam to escape
9. Brush a light coating of milk over crust and then sprinkle large grain sugar over
10. Bake in oven at 450 for 10 minutes, then turn down to 350 and bake another 45 turning pie every 15-20 so crust bakes evenly!

Let stand for at least an hour or two before serving. 


 If you don't have parchment paper you can use wax paper but seriously... there are so many uses for parchment paper.. you should have it in your kitchen as a staple!


The easiest/ best way to transfer your rolled out dough to place into or over pie dish without tearing dough... use your rolling pin and preferably 2 hands... but hey, I needed a photo! Also keep parchment paper along for the ride to keep dough from sticking to itself!


And VOILA! A beautifully baked Strawberry Pie! As you can see below... my pie had some leakage issues once we cut into it. All the same it tasted delicious! But I'm going to play around next time and make mini pies so I can figure out if adding more cornstarch or some tapioca and in what amount will do the trick!


We enjoyed the delectable sweet strawberry goodness and flaky gluten free crust with some Homestead Creamery Ice Cream all the same! The filling was delicious.. but seriously the crust... we all LOVE how good that Pamela's Gluten Free crust is!


Thursday, February 28, 2013

Dry Rubbed Salmon

I love seafood. Of seafood I particularly love salmon. Its almost as much a staple as chicken is in our house. 
I came across a dry rub recipe to put on salmon in my favorite food mag a few years ago.. Food & Wine and after a bit of tweaking, its become a favorite way to prepare salmon. The rub leaves the salmon with this sweet savory glaze on it that is just yummy!


My favorite way to use this rub is for the grill. Put the rub on the salmon and then place it over foil on the grill, or if you have one of those fish grill cages you can use that. This time I just baked it because well, it was 30 degrees outside and I didn't feel like standing around in the cold while grilling. 

Dry Rubbed Salmon:
Serves: However many you like depending on the size of fillet you buy, for us usually 4-6
Prep Time: 10 Minutes
Cook Time: 15-20 minutes 

Salmon:
Purchase FRESH! I don't like using frozen unless its from Costco and is the Kirkland brand. 
If using a large fillet- cut into individual portions. Try to cut the salmon so that the pieces will all cook as evenly as possible. 

Dry Rub: 
(I use this on a fillet of salmon that feeds 4-6- just increase it all a bit if you are serving more!)
1 tbsp brown sugar/ light brown sugar- which ever you have, but it needs to be brown (not white, not raw)
2 tbsp Sweet Paprika
2 1/2 tbsp Ground Cumin
1 tsp Cilantro
1 tsp Basil
1/4 tsp Season Salt
1/4 tsp Garlic Salt
1 tsp Garlic Powder
1 tsp Chinese Five Spice
1/2 tsp Red Pepper
1/2 tsp Ground Ginger
1/2 tsp Mustard Powder

Mix it up in a bowl- taste. Depending on your taste you may want to add or subtract for spice level and sweetness level but this is what I use. 

1. Pat salmon dry on both sides- don't need to wash it, but want it to have a dry surface. Then pour a little olive oil over and rub all over salmon- about 1 tbsp. 

2. Sprinkle dry rub generously over salmon fillets and rub into the flesh. Flip over and do the same for the other side. I like to get the whole fillet covered- both sides and all the edges. 

3. Place in a glass pyrex dish  if baking or on foil if grilling- use heavy duty foil and double it. 

4.  Bake- 350 degrees for 8-10 minutes - then flip fillets over gently using a wide flat spatula and bake another 8-10 minutes. This will cook it to a nice medium- the center on the thicker pieces will still be slightly rare- which is exactly how we like it. But hey, if you like your fish well done.. just keep on cookin it ;)

or 

 Grill- I like to light the gril and then quickly lay down one large double layered flat piece of foil to create an even and hole free cooking layer. 
- put grill on high and close- let it get to at least 350 degrees 
- then open grill and place fillets on foil. Turn heat to medium/ low and close. 
- Come back and check in about 7-8 minutes. Turn fillets over carefully using a wide ideally silicon spatuala. Bake another 7-8 minutes!!

Serve over a salad, with rice, or really any side dish you like! We had ours with some jasmine rice and snow peas!


 If you look closely at the picture below- you can see that the thinner pieces of the salmon fillet on the two pieces I layered over the thicker pieces beside it so they wouldn't over cook. I find it works pretty well- it will still be more cooked than the thicker pieces, but it will also still be tender and tasty- no dry and over cooked.
 Here they are all cooked! I flipped them over half way through- keeping those thin bits still layered (now underneath) the thicker pieces!


If you like salmon- then I hope you get a chance to try this recipe! Its so simple and very tasty! Its great fro summer barbecues and can really be used on any meat! Yes! You can use this same dry rub on pork, chicken, steak, shrimp... what ever you like! I usually half the brown sugar when I use it on steak and chicken- but its up to you and your taste buds!