Showing posts with label recipes. Show all posts

Saturday, October 19, 2013

Easy Fajitas!

Its been a rainy dreary Saturday here and after a most excellent 3 hour nap, because hey, what else is the weekend for, I made some very yummy and very easy steak fajitas for my family that I thought you all might enjoy trying!

This is usually how we do fajitas, well steak fajitas anyway in our house but you can always skip tortillas and put all of this over a salad for a great fajita salad too!


Easy Steak Fajitas
Serves:4-6
Prep Time: 15-20 min
Cook Time: 15-20 min

Grocery List:
2 lbs. cut of London Broil or Flank Steak that is an even 1 inch thickness
2 bell peppers (any colors you like)
1 large red onion
Tortillas
Sour Cream
1 Tomatoes
1 Avocado

Seasonings:
1 tbs Cumin
1 tbs Paprika
1/2 to 1 tsp Red or Cayenne Pepper depending on how spicy you want it
1 1/2 tsp season salt
1 tsp dry cilantro
1 tsp groung black pepper
1 tsp brown sugar
pinch of coffee grounds

1. Mix all seasonings together into a rub, lightly coat steak in olive oil, then salt and pepper and then spread rub all over flesh. Let steak sit 20 min to overnight.

2. Cut bell peppers and onion into 1/4 inch long slices. Heat Black Iron Skillet with 2 tsp olive oil and throw vegetables in over high heat. Cook over until onions are caramelized a bit, about 5 minutes, stirring frequently so nothing burns and then turn heat to low and cook another 3-7 minutes depending on how well done you like your fajitas veggies. You can season however you like either just s & p or add a bit of cumin, cayenne or hot sauce!

3. Chop up your toppings- Avocado and Tomatoes and anything else you want and place everything in serving dishes.

4. Heat a grill to at least 300 degrees, place steak on grill for 3 minutes per side. Then remove and let rest 10 minutes before cutting. (This will give you a nice medium rare), if steak is less that 1 inch thick then cook 2 minutes per side and if closer to 1 1/2 inches thick then add a minute per side. If you like your steak more well done, then don't come to my house for dinner! ;)

That's it friends! Its so simple! Then just grab your favorite tortillas and dish up some yummy Steak Fajitas! 
I like to chop my steak up before putting it in the tortillas so its easier to eat, or you can just slice it really paper thin and that will do the trick too! 
This dish is simple and healthy. We don't even do any additional sides because you really get all you need in the fajita and this can easily accommodate any vegetarian friends o family by just skipping the steak since you cook them separately!


Thursday, August 22, 2013

Fresh Bounty

So one of my favorite things to do on vacation is... eat in! Yeah, seriously, I do enjoy the occasional meal out, like the scrumptious Lobster dinner I had while eating out tonight! But mostly, i enjoy having the time and leisure to cook whatever I want while on vacation and not worry about having it all ready and on the table by  like during the work week for my family. 

Here in upstate NY the veggies always seem extra packed with flavor and sweetness because of the shorter growing season... maybe its my imagination but seriously, I look forward to the road side farmers stands in the Adirondacks all year long! 

So a few nights ago I made a simple Shrimp Pasta with some delicious and sweet tomatoes. Mom and I ate on the back porch enjoying the sparkly view of the lake visible in little blips through the filter of trees. 


30 Minute Shrimp Pasta:
Prep Time: 10 minutes
Cook Time 30 minutes
Serves: 2

1/2 bag 25-30 count size shrimp (peeled and deveined)
1 package Quinoa Pasta (12 oz)
1/2 bag Baby Spinach
3 cloves garlic minced
2 tbs butter
1 tbs olive oil
1 juicy fresh large tomato

1. Thaw shrimp in cold water- may need to empty and refill with cold water again after 10 minutes. (Peel and devein if not already)
2. Fill large stock pot with water to 3/4. Put on stove to boil
3. Mince Garlic and place in large skillet with butter and olive oil, heat to low-medium.
4. Place pasta in boiling water to cook.
5. Once garlic and butter/olive oil has cooked 3-4 minutes, add shrimp.
6. Cook shrimp over medium heat til just pink, add all the baby spinach and let shrimp continue to cook while spinach wilts.
7. Once pasta is cooked drain.
8. Toss pasta in skillet with shrimp and spinach. Salt and pepper to taste. Add diced tomato and toss to distrubute evenly.

9. Plate and serve with parmigiano!

Enjoy!


Monday, July 22, 2013

Blanched Kale Salad and Lemony Shrimp

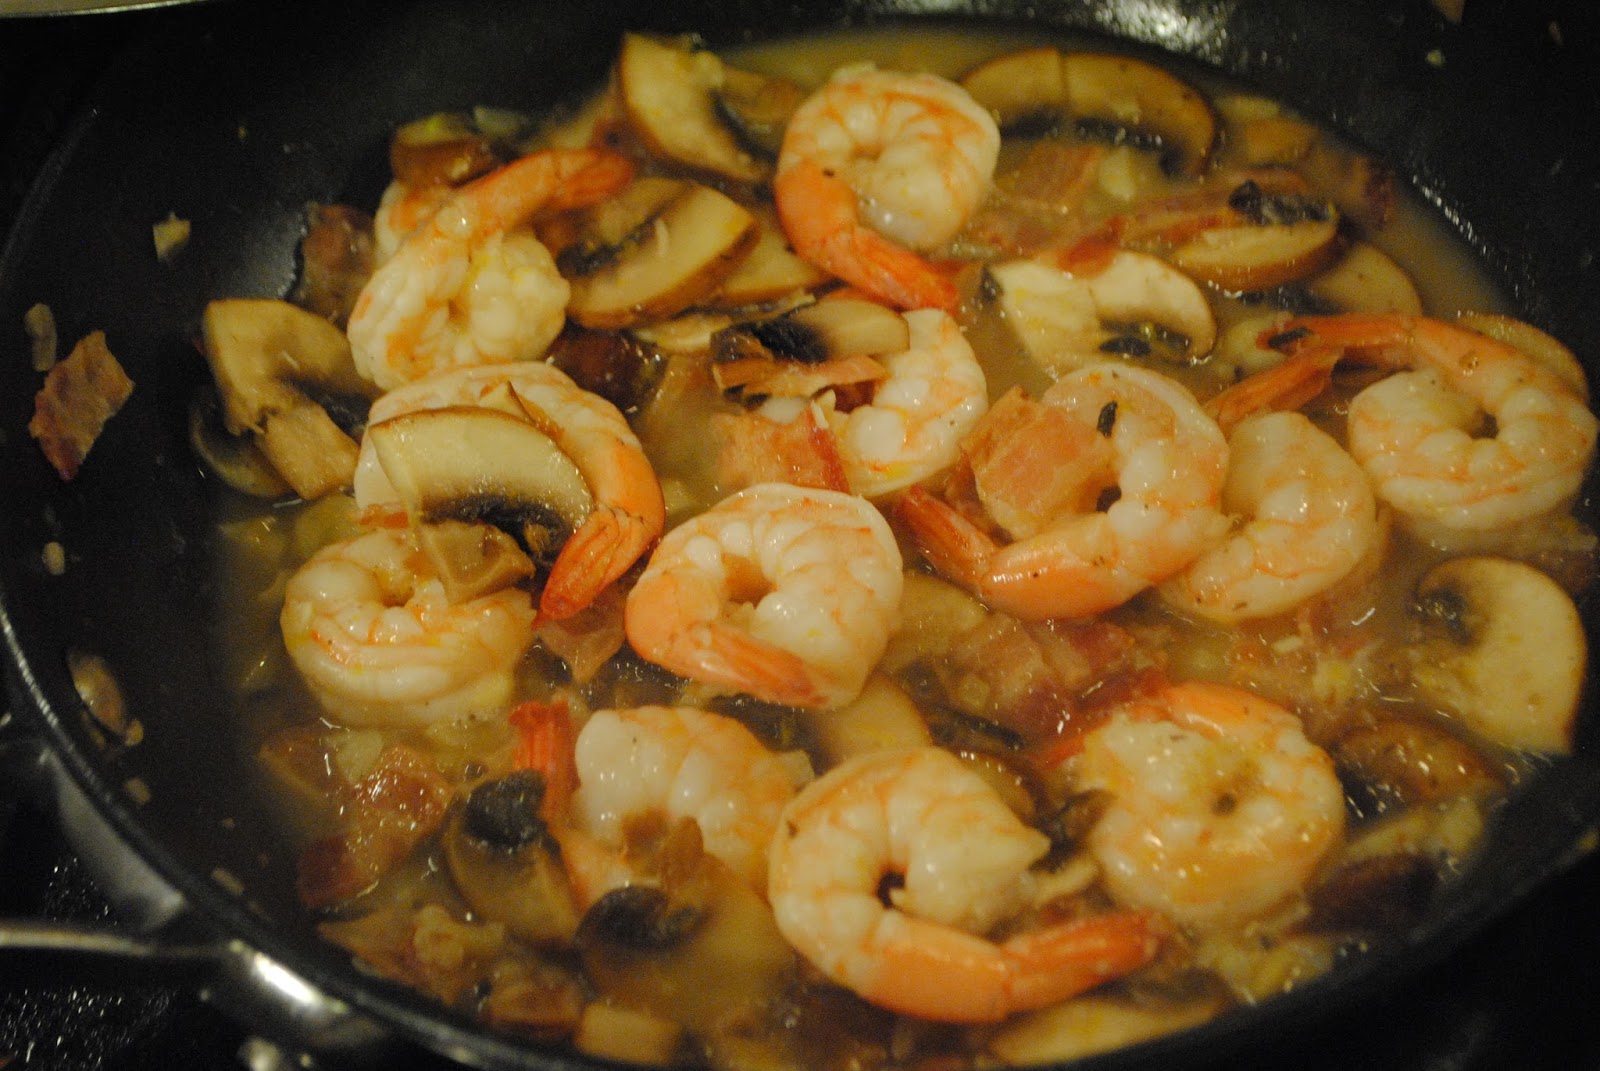
Last night I had one of those... hmm, what to cook nights. And after looking through the fridge and freezer I threw together a tasty and healthy dinner of Blanched Kale Salad and Shrimp with Mushrooms in a Lemony sauce. 

I love Kale... but not raw. I just have a really hard time getting past the deep earthy mineral-y flavor. So  my way of getting around that while still maintaing all the nutrients of raw Kale is to blanche it! Its so easy! Then I just make whatever dressing I'm feeling like and mix it up and ta-da! A beautiful bright green and still crunchy Kale Salad with a much milder flavor. 


Kale Salad:
Serves 4
Prep Time: 10 min

8-10 Large Kale Leaves- de-stalked and chopped into 2 inch pieces
1 tbsp Balsamic Vinegar
1tbsp Lemon Juice
1-2 tbsp Extra Virgin Olive Oil
1 fresh corn on the cobb- just the kernels sliced off and quickly sauteed for 2-3 minutes
1/2 cup cherry tomatoes quartered

1. Place chopped kale leaves in a large heat safe bowl, pour near boiling water over kale just enough to cover. 
2. Using tongs swirl kale, making sure all leaves are submerged. Wait 30 Seconds
3. Drain water and refill with cold water from the sink- add 2 cups ice cubes
4. Using tongs stir kale to make sure the ice water reaches everything and then drain. Squeeze excess water from kale leaves. 

5. Loosed kale by gently rubbing leaves through your fingers. Add Balsamic Vinegar, Lemon juice and Olive Oil. Stir kale to incorporate evenly, then add corn, tomatoes, and Salt & Pepper to taste.

Serve immediately or store in a sealed container the fridge for up to 2 days. 


Shrimp with Bacon and Mushrooms in Lemon Sauce:
Serves 4
Prep Time: 20-30 min
Cook Time: 20 Min

1 bag shrimp, peeled and deveined
6 Large Baby Bella Mushroom- sliced 1/4 inch thick
6 slices bacon- cooked and chopped (I use the Oscar Meyer precooked)
3 cloves garlic- minced
1/4 cup white wine
4 tbsp butter
2 tbsp olive oil
1 lemon- zest and juice

1. Thaw shrimp in cold water for 20-30 minutes ahead of time
2. Heat skillet to medium high, add 2 tbs butter and 1 tbs olive oil. Once heated add mushrooms- cook until nicely carmelized. About 6-8 minutes
3. Put mushrooms in prep bowl, cook or reheat bacon depending on if using raw or pre-cooked. Drain any excess oil.
4. In same pan as mushrooms and bacon, add 2 tbsp butter and 1 tbsp olive oil. Add minced Garlic. Add Shrimp. Turn heat to medium. Add 1/4 cup white wine, lemon zest and lemon juice.
5.  Cook shrimp in sauce until cooked through, about 2-3 minutes per side. 

Serve over rice, pasta or a salad!


Friday, July 19, 2013

A Habana Cafe Inspired Recipe

So as you may remember in a recent post, I had delicious meal at my favorite Cuban restaurant, Habana Cafe while in Gulfport Florida back in May. So when I put some rice on to cook and was looking around trying to think of what I wanted to make for dinner, I thought black beans and shrimp and then I thought, Cuban Black Beans and Shrimp!

And voila! About 30 minutes later I was sitting down to my own homemade version of that oh so memorable meal after a quick search for how to make Cuban Black Beans!


Shrimp in Coconut and Butter Garlic Sauce:

1 Bag Raw Shrimp (I used the 20-25 count size so they were about the size of my thumb, fairly large)
1 lemon
4 cloves of Garlic diced
1-2 tbsp Extra Virgin Coconut Oil
2-4 tbs unsalted butter
1/4 to 1/2 cup white wine (Pinot Grigio or Chardonnay works well)
1/2 tsp salt and 1/2-1 tsp black pepper

1. Thaw shrimp in cold water. Yes, COLD not warm, cold water! (They actually thaw much faster in cold)
2. Mince Garlic
3. Once shrimp are thaw, put Coconut Oil and Butter in a pan and heat to medium. Add garlic while pan is still heating up.
4. Let garlic cook 1-2 minutes (just want to soften, not crisp or burn!)
5. Add Shrimp and wine. Zest lemon and squeeze 1/2 lemon into pan. Add salt and pepper
6. Cook shrimp til tender but not overdone... about 2-3 minutes per side at Medium(4-6) to High(6-9) heat.

Serve with black beans over rice, use liquid as a sauce over rice. Option- serve rest of lemon in wedges to be squeezed over plate.


Cuban Style Black Beans:
via Marta of Babalublog
This is not exactly like Marta's but her's laid the base for how I made mine!

2 Tbsp. of Extra Virgin Coconut Oil
1/4 Large red onion diced
1/2 Red bell pepper diced
2 cloves of garlic, diced
1 can of black beans 
1/4 cup of red or white wine
1 tsp. of sugar 
1/2 tsp. oregano
1 packet of Goya seasoning with azafran- *I didn't have this so I just used a pinch of saffron from my stash and 1 tsp Cumin!
salt and pepper to taste


1. Dice onion, pepper and garlic. Heat black iron skillet to medium with Extra Virgin Coconut Oil. Toss diced veggies in.
2. Let veggies cook 3-5 minutes on medium to medium low heat.
3. Partially drain black beans but leave some of the juice in can (if you like your beans more swimming than don't drain at all)
4. Pour wine into pan and stir veggies. Then add black beans.
5. Add seasonings- sugar, Goya Seasoning or Cumin and Saffron, oregano,salt, pepper
6. Let cook on medium for 5-10 minutes or let simmer on low while you cook rest of your meal!

Serve alone or over rice!


I made this recipe in about 30 minutes! It was simple but definitely in the Delicious of the Most category!


Sunday, July 14, 2013

Stuff People Say To Celiacs

I stumbled upon this video today thanks pinterest and just had to share because it is so true. Funny yes, but also it points out the on-going frustrations and sometime insensitive responses of those around people who deal with gluten intolerance and/or celiac disease. 

I have been gluten free since the beginning of my senior year in college, so from September of 2009. And yes, I have heard every single one of these lines as exemplified in this video.

This past December I decided I wanted to know once and for all if I did or did not have celiac. I began eating one serving of gluten a day for 12 weeks so I could be tested officially for celiac. Yes, that is how long you have to expose your self to gluten before you can be tested. It turned out, after 12 weeks of enjoying eating anything I wanted... although I definitely did have the same unpleasant side effects that I used to have, I got tested and received the result that I am not celiac.  I was honestly shocked because I have celiac symptoms whenever I eat gluten. As my Gastroenterologist reminded me, the only test they have is to check if you are or are not celiac, not to test if you are gluten intolerant or allergic and to what extant. He encouraged me to continue on a gluten free diet if it made my celiac like symptoms go away. For me, that means I continue to live a gluten free life and basically live as if I was celiac. 
And I am really ok with that! I don't feel deprived and I enjoy knowing that I can eat without fear of something upsetting my system.


If you know someone who is celiac or even thinks they are celiac/ gluten intolerant because they've found living a gluten free life means they no longer have to deal with IBS symptoms, severe stomach cramps, migraines and the list goes on, please, don't pester them with questions or jokes about how its so inconvenient being friends with them now because of the limited places they can eat etc. I've been there and still am there and as much as I can laugh it off when a friend jokes about my dietary needs being an inconvenience to them, deep down it hurts. I already know it causes an inconvenience and if I could change it I would, but to do so would mean dealing with the aforementioned side effects of being gluten intolerant and personally, I'd rather not live under the constant concern of where the nearest restroom is or if my headache is going to turn into a full blown debilitating migraine. 

So be considerate, there are TONS of gluten free options available today, many of the chain restaurants have gluten free menu's that weren't around just 4 years ago when I first when GF. Do be aware that they don't always cook in a seperate gluten free kitchen so there is no true guarantee ( I personally avoid the chains and go for local gluten aware restaurants), let your gluten free friend decide based on their risk/comfort level.  And no, salad is not always what we who deal with gluten issues want to order so please don't assume we want it! ;)

On the flip side, if you have a gluten free friend who complains all the time (and I have met some people who like to use it as a woe is me) then be encouraging and remind them of all the options! And if they still keep boo hoo-ing then by all means, give them a hard time and tell em to suck it up because really, its NOT THAT BAD,  at least, not when you live in a 1st world country and are privileged enough to have all the shopping amenities and options that are now available! :)

Speaking of gluten free, I can't wait to try some of the recipes from Naomi's website Better BatterBonus.. her products are sold at my local Whole Foods! Yes!

Sunday, July 7, 2013

Coconut Tilapia with Stuffed Bell Pepper

ForI LOVE fish! In fact, when I finish with my juice fast I intend to use it as an opportunity to completely change my food lifestyle by eating primarily vegetarian... except I can't give up fseafood. I just love it to much, so I will actually be adopting a pescatarian diet.

In the mean time, here is a meal I made last week before starting my juice fast thanks to some beautiful fresh tilapia I found at Costco. 

When I got it home I knew I wanted to do something simple by tasty with it and since I was feeling kind of lazy I came up with this quick and simple way of cooking it. It turned out to be DELICOUS!


Coconut Tilapia and Stuffed Bell Peppers
Serves: 4
Prep Time: 15 minutes
Cook Time: 30 minutes

I suggest starting on the peppers first so they can be baking in the oven while you cook the fish!

For Fish:
1/2 cup Coconut Flour (find at your local natural foods/ health store or whole foods)
1 tsp salt and 1 tsp pepper, 2 tsp Paprika 
3-6 tbs Virgin Coconut Oil (it has much more flavor and health benefits then 2nd pressed)
Fresh Tilapia- at least 4 fillets 

For Stuffed Peppers:
2 large bell peppers (I prefer red, orange or yellow over green personally) to stuff
1 pepper to chop up
3 big handfulls of chopped Kale (stems removed)
1 zucchini chopped
1 cup of cooked rice (jasmine, brown, black) or quinoa (left overs work great!)
3 cloves garlic minced
2 tbs lemon
salt and pepper to taste
olive oil or coconut oil

The fish is so easy- just mix the salt, pepper and paprika into the coconut flour and set on a plate. Dredge the fillets straight from package or after a quick rinse if you prefer in the flour then set on a clean plate. 

Heat Coconut oil in a large flat bottom pan. Bring to high heat. When oil heated add dredged fillets and turn heat to medium. Let cook 3-4 minutes then flip and cook another 3-4 minute or until flesh is firm. 


To make Stuffed Peppers:

1: Rinse all veggies and cook rice if not already cooked, set oven to 350 to preheat
2: Cut top off pepper by running knife all the way around so as to keep the seed bunch easily removable with the top. I then chop the out parts of the pepper top up and add it into the mix but you can save it to pace back on as a top when cooking if you like- just remove the seeds/center. 
3: Clean out interior of peppers from any seeds or pith (the white bits) and blanch in boiling water for 30 seconds to 1 min. Then place them directly in a cold water/ice bath to stop cooking. Drain and rub interior with a bit of oil using fingers. 
4: Dice other veggies (zucchini, peppers, kale) into small 1/2 inch bites and mince garlic. 
5: Heat another skillet with oil (I like coconut) to medium heat and add zucchini, peppers and garlic. Cook 4 minutes
6: Add kale and cook another 4 minutes. Add lemon juice, salt, pepper and any other seasoning you might like! Add rice. Stir until whole mixture is well incorporated. 
7: Using a spoon, stuff peppers with mixture. You can really pack it in!
8: Place peppers in a glass baking dish and put on middle rack in oven at 350 for 20-30 minutes!

Once peppers are tender slice in half gently and using a spoon plate with fish! Or use more peppers and double the filling and give each person a whole pepper! I served half a stuffed pepper per person and so 2 stuffed peppers served 4 of us!

Bon Appétit!


Wednesday, February 27, 2013

Lamb Osso Buco

So my Dad stopped at Costco on his way home from work earlier this week.. and grabbed the usual Costco family favorites (in ours at least) of fresh salmon and rotisserie chicken. But he also got Lamb Osso Buco cuts! 

I have never cooked lamb before, but since getting my Chasseur dutch oven a year ago, its one of the meals I've been dreaming about cooking! And of course, my parents have been dreaming about getting to eat it, after I cooked it! ;) (Truth!) Haha, anyway, I went ahead and made Lamb Osso Buco for Sunday Dinner this past weekend and it was DELICIOUS!! 
As well as surprisingly affordable and easy. The package of 6 lamb steaks with bone in was less than $15 from Costco! That's cheaper than most steaks or pork tenderloins!


This dish is rich, but not overly so, not in a heavy way. Its rich in a flavorful succulent delicious way. Cooking it low and slow in a dutch oven really allows the flavors to just blend and meld together. 

Rustic Lamb Osso Buco:
Serves- 4-6
Prep Time- 40 min
Cook Time- 4-6 hours

Ingredients:
Lamb- osso buco cut- just ask your butcher!
1 large or 2 small onions- chopped 1/2 inch
2 carrots chopper 1/2 inch
2-3 stalks of celery chopped 1/2 inch
7 cloves of garlic- loosely chopped
2 tbsp tomato paste
1 cup dry red or white wine
1 cup beef stock
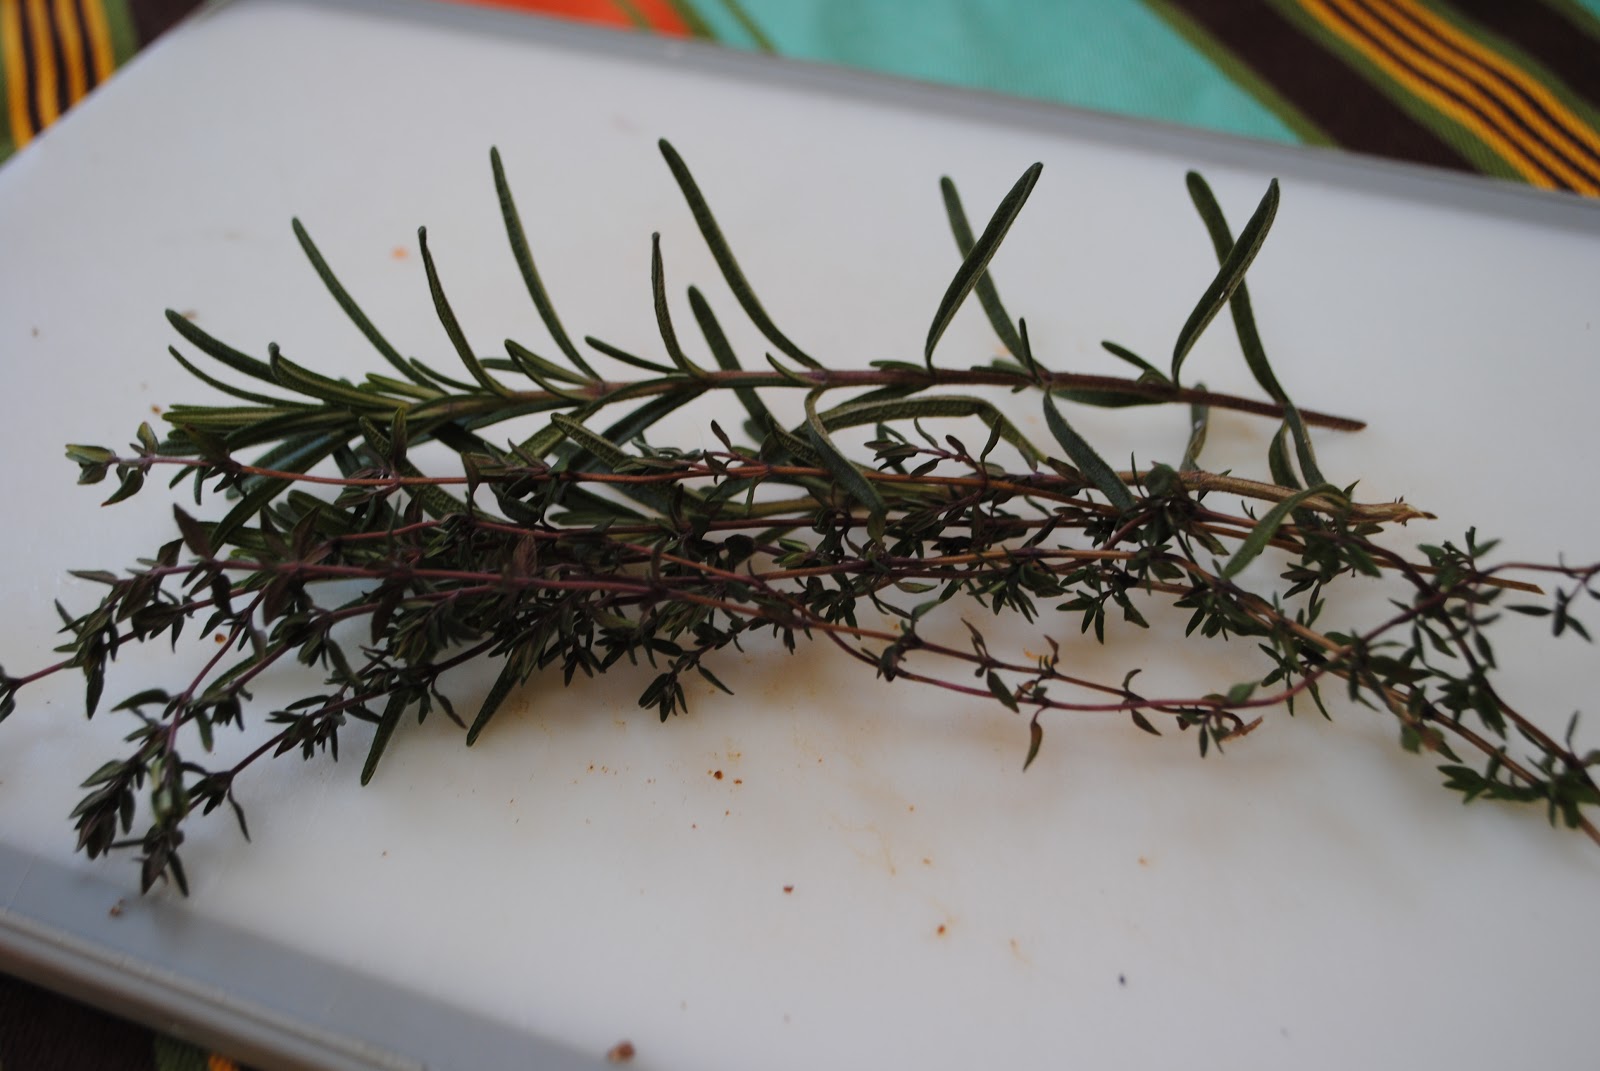
2 sprigs Rosemary
4 sprigs Thyme
2 tbsp flour- can use gluten free!
Sea Salt
Pepper
Olive Oil
1 large oven safe pot- I use a Chassuer enamel coated cast iron 7 qt pot.

1. Preheat oven to 250 degrees. Pat your lamb dry with with a paper towel and season both sides well with sea salt and black pepper
2. Put 2-3 tbls olive oil in pot and place on mid-high heat. Once to temperature place lamb in pot and sear about 5 minutes each side.

3. Remove lamb and set aside on a prep plate. Turn to medium heat. Place onion in pot and cook 3 minutes. Add Carrots, Celery and Garlic- cook 7-8 minutes. Then shake the 2 tbsp of flour over veggies and cook another 2 minutes.

4. Add 2 tbsp tomato paste to veggies and stir. Then add 1 cup dry wine (white or red of your choice) and 1 cup beef stock. Stir with wooden spoon scraping bottom to get up the good bits! Salt and Pepper to taste.

5. Place lamb back in pot, settling it into the veggies and sauce. Add the sprigs of rosemary and thyme over lamb. (No need to detach leaves from stem- they will add the flavor just as is.)

6. Cover oven safe pot and place on rack- 1 below mid height- and set timer for 4 hours. Leave it in oven to slow cook for 4-6 hours!

Serve over Parmesan Garlic Mashed Potatoes, Polenta or Risotto! Enjoy!


 About to go in the oven for 5 hours!!
 After being in the oven for 5 hours... and fall off the bone tender!


Friday, February 22, 2013

Rainy Day Chili

So I will be very honest with you all and let you know, I don't particularly like chili. It's just not a food that gets my taste buds excited, in fact its more likely to make me lose my appetite but then I have some really weird and random food put offs. Like steak, I don't know why but sometimes the smell of steak cooking makes me feel ill. Other times, it makes my mouth water. 

Anyway, non of that is really important because today, I'm sharing with you a recipe for Chili that I do like to eat and every now and then make. I usually only want chili or soup if its very cold out and even more so if its a rainy day! Call me a Hobbit, I really am!


So yesterday it was very cold out and perhaps because I had walked our little yorkie Fritz twice that day I just wanted something warm and filling and hearty.  I also didn't want to slave over a stove for very long to get it. This recipe is simple and takes less than 30 minutes to throw together because it uses precooked canned beans! Bonus- you only need one pot! You can eat it right away or leave it on low heat for an hour or three til you're ready to eat!

Rainy Day Chili:
Serves- 4
Prep Time- 5 min
Cook Time- 30 or less

Ingredients:
1 large or 2 small yellow onions (if you like raw onion to put on top cut up extra)
1 lb lean ground beef or turkey if you prefer
1 can diced tomatoes (I used italian seasoned but feel free to use plain or spicy)
1 can chili beans (these are kidney beans that come in a chili sauce)
1 can cannellini beans
1 can black beans
1 can navy beans
1 large enamel cast iron pot (like this one) if you don't have one, use a large stock pot!

Spices:
2-3 tbsp cumin (I might have a slight obsession with cumin!)
1 tsp chili powder (or more, whatever is most to your spice level)
1 tsp paprika
1 tsp season salt or regular salt
1 tsp black ground pepper
1 tsp garlic powder


1. dice onion however you like it for your chili, I kind of julienned mine- then heat pot on stove over medium heat and add 1-2 tbsp olive oil. 

2. cook onions til translucent and softened. Now its up to you on this but I just throw my ground beef in at this point to cook and let the onions continue to cook with it but if that weirds you out, then just scoop out the onions and set aside in a prep bowl to add back once the beef is cooked. To the beef while it is cooking, add your spices (reserve 1 tbsl cumin)

3. Once beef is cooked add back your onions. Also add the can of diced tomatoes and the can of chili beans- don't drain these just add them directly to the pot. 

4. Open your other cans of beans and drain and rinse those ones thoroughly. No need to have extra sodium when you have enough in your recipe already. I usually rinse and drain them with some good shakes 3-4 times for each can- you can always throw them in a colander too but thats an extra item to clean. 

5. add drained beans to pot. Stir to incorporate it all together and add that last 1 tbsp of cumin. 

6. Try it.. if its not spicy enough or seasoned enough- add what you like to make it your own. I'm going off an approximation of what I used and probably ended up adding a little more paprika and chili. I also  sprinkled in about 8 drops of Tabasco sauce. 

7. Cover and put on low heat, let heat through and serve whenever! 

We put some fresh grated cheddar cheese over ours and my dad added some crushed up tortilla chips. 


 If you use lean ground beef and just enough olive oil to provide a non stick coat to the onions, you shouldn't really have any grease to drain. There'll be just enough to add a little more flavor to your chili!
 Yum! I love how colorful this chili is by using the different types of beans. It provided a nice textural difference and makes it more appetizing than just using kidney beans. 


It heats up for some tasty leftovers too!